.jpg)
Thursday, May 28, 2009
I'm still here!
.jpg)
Wednesday, May 20, 2009
Fishing Rodeo


Here's a great shot of Sam and Amanda. She's affectionately known as "Baby Girl." Bet you can't guess why.
Monday, May 18, 2009
Frame Class
 These ladies are my Mom (on the left) and Kelly (on the right). Hi Kelly!! How do you like seeing your picture on the web? I'm sorry the picture has a glare on it, but you can get an idea of what they look like. Everyone's frames turned out so pretty. They all had their own little differences so they were similar, but different.
Saturday, May 16, 2009
- Picture frame with (3) openings for 4 x 6 photos
- Designer Series Paper of you choice. I used Le Jardin
- coordinating card stock
- vellum
- vellum runner
- Snail
- temporary adhesive
- foam mounting tape
- craft knife
- paper trimmer
- assorted embellishments of your choice
 The first step is to take out the matting of your frame and cut out the dividers with your craft knife. This will make one large opening for your name.
 I sponged ink around the inside edges of my mat, but that is up to you. The opening is now wider than 12", so you must cut a 12 x 12 paper in 1/2 and match up the pattern to hide the seam.


 Cut out each individual letter, and cut out different patterns of DSP the same size to put behind the vellum. Now your beautiful DSP shows through the vellum.

 Now, to get your letters on there straight, lay your paper on grid paper nice and square. Lay a ruler on a line, and and bump all your letters up to the bottom of the ruler. To make sure they're centered, find the center of the paper, and lay down your middle letter first. Make sense?
 Now you want to start to embellish it. I chose a coordinating card stock, and used my new eyelet edge punch. Now remember, your opening is wider than 12". So you'll have to cut another piece of card stock and match up the punches to make a seam. Make a note that the card stock is about one inch lower than your bottom edge, to make extra room to attach it at top and bottom of the mat.
 I chose these flowers from the Pretties Kit to embellish with. I colored the big one with my Bashful Blue marker on the petals and left the center white.
 I used my So Saffron marker on the medium flower. I didn't end up using the smallest one, but it was Always Arthichoke. Sorry this picture is so blurry.
 I used my blender pen to soften and blur the lines, adding and removing color until I liked how they looked. It was very easy and I love the results on the flowers. I then layered them and added a halfback pearl to the center of my flower.
 I used my *gasp* Creative Memories cutter to cut out the oval for the first names and Bible verse. I really like how this tool works, and I haven't ever bought the Coluzzle. I layered Very Vanilla onto Bashful Blue, then onto Always Arthichoke.
  Once I had all my main pieces, I just started laying stuff out and moving it around until I like how it looked. I used the ovals to cover up the seam in the Always Arthichoke.
 Once you know the placement of all the "Stuff", it's time to attach it to your mat. I used Foam Mounting Tape, folded in half to make it thicker. Attach it all the way around the inside of your mat. Then just attach your finished piece, making sure it's straight.
 The Pretties Kit flowers were attached with glue dots after my main panel was attached to the mat. So were my ovals. I put Snail on the area where the ovals came in contact with the mat, and I put some mounting tape where they were supposed to be raised off the main image. Then you just pop the whole thing into your frame and you have a beautiful work of art.

 If you decide to try one, let me know!! Send me a link and I'll be sure to check it out. Thanks for stopping by, and have a great day!!
Tuesday, May 12, 2009
Boys Can Stamp, too!
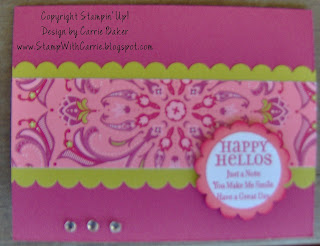
 The inside says "hope your day is blooming with love." I think it's so sweet and I'll keep it forever!!
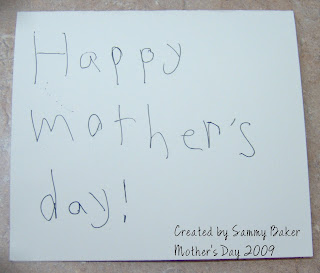
 This one is from Sammy. He didn't use any stamps, just wrote what he wanted to say! Sammy didn't ask for any help, of course if you're 12 years old, you should be able to cut and score straight! Oh, he's standing here reading over my shoulder, and he said he didn't score it!! Now I'll have to go make sure he just folded it straight. LOL.

- paper trimmer
- scissors
- vellum runner
- picture frame
- adhesive
The vellum runner can be purchased at Carolina Stamper for $5 or $6. If you don't bring the required supplies, I will have some available for use for a fee. I'll be calling everyone to see which date you plan to attend and remind you of supplies.
I plan on posting a tutorial for the Name Frame on here soon. That will be interesting!! I've never done a tutorial before, but I took pictures of every step while making my frame, so it might take me a while, but it will get done!!
Thanks for stopping by today. I'll see you later!
Monday, May 11, 2009
Mother's Day


 I have one more session for this class on May 29. I'll let you know how it goes. Thanks for stopping by!


